介绍
这是我开发的Astro开源博客主题,名字叫Astro-Yi,喜欢的可以点个star啦,感谢关注,欢迎PR!
配置Astro-Yi
本博客唯一的配置文件位置在src/consts.ts,您可以根据自己的需求进行一些修改。
博客信息配置
在Astro-Yi主题的配置文件src/consts.ts,其中有一些配置是很重要的:
1export const site = {2 title: "Cirry's Blog", // 网站标题(必须填写)3 favicon: '/favicon.svg', // 网站图标(必须填写)4 author: "Cirry", // 文章作者名称(必须填写)5 avatar: '/avatar.png', // 头像(必须填写)6 description: '', // 网站描述(建议填写)7 motto: '', // 个性签名(建议填写)8 url: 'https://cirry.cn', // 网站地址(必须填写)9 baseUrl: '', // 当您使用github pages部署的时候,必须填入仓库名称以/开头类似: '/astro-blog'10 recentBlogSize: 5, // 显示最近文章数量(必须填写)11 archivePageSize: 25, // 归档文档每页数量(必须填写)12 postPageSize: 10, // 博客每页展示文章数量(必须填写)13 feedPageSize: 15, // 动态页面每天展示文章数量(必须填写)14 beian: '', // 国内网站备案信息15 asideTagsMaxSize: 0 , // 当侧边展示的标签太多的时候,可以设置展示更多1 collapsed line
16}favicon是网站图标存放位置。文件位置在/public/favicon.svg,请替换为自己的网站图标。
avatar是网站头像存放位置。文件位置在:/public/avatar.png,请替换为自己的网站头像。
填完上面配置,就已经配置完了网站了,想要更多的功能和内容继续往下看。
评论系统配置
评论支持对接waline和giscus,目前来说giscus更简单一点,waline更方便迁移和配置。
安装waline可以参考Waline官网或者我的文章安装waline评论功能。
安装giscus可以参考giscus官网和基于 giscus 为网站添加评论系统。
1/**2 * @typedef {Object} WalineConfig - Waline 评论系统的配置3 * @property {string} serverUrl - Waline 服务端地址4 * @property {string} lang - 评论语言5 * @property {number} pageSize - 每页显示的评论数量6 * @property {string} wordLimit - 评论字数限制7 * @property {number} count - 显示的评论数量8 * @property {boolean} pageview - 是否启用页面浏览量统计9 * @property {boolean} reaction - 是否启用表情反应10 * @property {string[]} requiredMeta - 必填的用户信息字段11 * @property {string[]} whiteList - 白名单路径,允许评论的页面路径12 */13
14/**15 * @typedef {Object} GiscusConfig - Giscus 评论系统的配置44 collapsed lines
16 * @property {string} data-repo - GitHub 仓库名称17 * @property {string} data-repo-id - GitHub 仓库 ID18 * @property {string} data-category - 评论分类19 * @property {string} data-category-id - 评论分类 ID20 * @property {string} data-mapping - 评论映射方式21 * @property {string} data-strict - 是否严格匹配22 * @property {string} data-reactions-enabled - 是否启用表情反应23 * @property {string} data-emit-metadata - 是否发送元数据24 * @property {string} data-input-position - 评论输入框位置25 * @property {string} data-theme - 评论主题26 * @property {string} data-lang - 评论语言27 * @property {string} crossorigin - 跨域请求设置28 */29export const comment = {30 enable: false,31 type: 'giscus', // waline | giscus,32 walineConfig:{33 serverUrl: "https://xxxxx.xxxxx.app",34 lang: 'en',35 pageSize: 20,36 wordLimit: '',37 count: 5,38 pageview: true,39 reaction: true,40 requiredMeta: ["nick", "mail"],41 whiteList: ['/message/', '/friends/'],42 },43
44 // giscus config45 giscusConfig: {46 'data-repo': "xxxxxxx",47 'data-repo-id': "xxxxxx",48 'data-category': "Announcements",49 'data-category-id': "xxxxxxxxx",50 'data-mapping': "pathname",51 'data-strict': "0",52 'data-reactions-enabled': "1",53 'data-emit-metadata': "0",54 'data-input-position': "bottom",55 'data-theme': "light",56 'data-lang': "xxxxxxxxxxx",57 'crossorigin': "anonymous",58 }59}reaction并不是只能设置true/false,你也可以传入一个数组里面是图片的地址来实现自定义表情,具体详情可以参考这里文章反应。
友情链接配置
1/**2 * 友情链接3 * name: 博客名称4 * url: 博客地址5 * avatar: 博客头像6 * descript: 博客描述7 * @type {[{name: string, description: string, avatar: string, url: string}]}8 */9export const friendlyLinks = [10 {11 name: "Cirry's Blog",12 url: 'https://cirry.cn',13 avatar: "https://cirry.cn/avatar.png",14 description: '前端开发的日常'15 },1 collapsed line
16]赞助系统配置
1/**2 * 赞助系统3 * enable: true 开启, false 关闭4 * tip: 赞助提示5 * wechatQRCode: 微信二维码地址,图片地址应放在public目录下6 * alipayQRCode: 支付宝二维码地址,图片地址应放在public目录下7 * paypalUrl: Paypal二维码地址8 * @type {{paypalUrl: string, alipayQRCode: string, enable: boolean, wechatQRCode: string, tip: string}}9 */10export const donate = {11 enable: true,12 tip: "感谢大佬送来的咖啡☕",13 wechatQRCode: "/WeChatQR.png",14 alipayQRCode: "/AliPayQR.png",15 paypalUrl: "https://paypal.me/cirry0?country.x=C2&locale.x=zh_XC",1 collapsed line
16}搭建网站教程
本网站是在Debian11下,使用docker搭建waline做评论系统、gitea文档仓库、drone做自动部署,在服务器中安装postgres作为waline和docker的数据库,并定期备份到华为的obs中。
搭建流程和文章都有记录,在网站中使用搜索功能,搜索对应的关键词就能看到文章,欢迎大家一起搭建使用。
写作技巧
Markdown文档规范
如果使用Astro作为博客的话,必不可少的需要使用到Markdown,基础的规范可以参考Github的写作规范基本撰写和格式语法。
编写博客页面
在Yi的主题下,只需要在src/content/blog中新建一个md文档,就可以开始编写博客了。
根据Astro的Markdown文档标准,每个文档都应该有自己的frontmatter信息,并在md中文档的头部添加---作为开头和结尾来标记frontmatter,这给我们带来了很多的便利:
-
比如我们想要给文档添加标签和分类或者置顶某些文档,我们可以在Frontmatter中给文档添加一些属性,比如
tags,sticky等等。 -
比如为避免使用中文作为博客路径和文件名称,我们可以给md文档单独设置
title为中文标题,文件名使用英文并用-作为单词连接符号。
在Astro-Yi中,您只需要最简单的设置文档标题title和创作日期date标签,下面就是一个Md文档最简单的frontmatter的设置:
1---2title: 菩萨蛮·花明月暗笼轻雾3date: 2024-03-054---如果您觉得这样的文档属性不太够用,Yi也提供了更多的属性供您使用,这是一个完整的属性配置示例:
1---2title: 菩萨蛮·花明月暗笼轻雾 // 文件名称3description: 此词当是李煜描写自己与小周后幽会之情景,创作于北宋乾德二年(公元964年)前后。 // 文档描述4date: 2023-01-25 // 发布日期5tags: // 文档标签支持数组和字符串6 - 诗词7category: 诗词 // 文档分类支持数组和字符串8sticky: 100 // 文档置顶权重,数字越大,权重越大9slug: poem/ci // 文档永久链接10mathjax: false // 是否开启公式显示11draft: false // 是否为草稿12toc: true // 是否需要文章标题目录13donate: false // 是否需要开启赞助功能14comment: false // 是否需要开启评论功能15ogImage: // 添加文章封面在分享链接时候显示1 collapsed line
16---以上的属性除了title和date,其余都是可选的或者是有默认值的,您可以在src/content/config.js中修改他们是否可选或者默认值。
编写动态页面
在Yi的主题下,只需要在src/content/feed中新建一个md文档,就可以开始编写你的动态了。
动态页面应该是类似朋友圈、微博、推特这样,作为一个临时想说或者想吐槽一些什么的地方。
所以没有给它添加过多的frontmatter限制,您甚至不需要设置title(当然这样的内容也不需要title),但是我们知道发布一个消息,最重要的属性就是发布时间,所以需要设置date。
所以动态页面的Md文档的frontmatter的基础设置应该是这样:
1---2date: 2023-01-25 10:23:313---Vscode自动生成frontmatter
参考信息:Snippets in Visual Studio Code
左下角->设置功能->选择添加用户代码片段
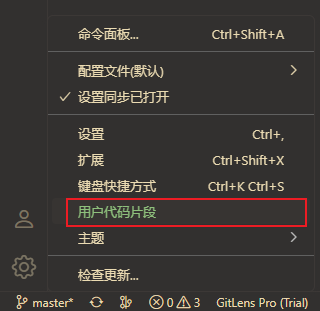
然后选择新建全局代码片段
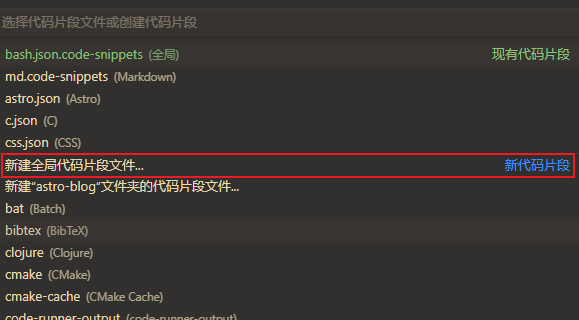
输入代码片段文件名称后回车,会自动创建文件
1{2 "Print to console": {3 "scope": "md,mdx,markdown",4 "prefix": "mf",5 "body": [6 "---",7 "title: ${0:$TM_FILENAME_BASE}",8 "date: $CURRENT_YEAR-$CURRENT_MONTH-$CURRENT_DATE $CURRENT_HOUR:$CURRENT_MINUTE:$CURRENT_SECOND",9 "description:"10 "---"11 ],12 "description": "Log output to console"13 }14}配置完成之后,在markdown文件中,输入mf按下tab就可以生产frontmatter信息了。
加载本地图片
将你的图片文件放在/public/images目录下,如果没有images文件夹就创建一下 ,然后在Markdown中使用绝对路径/images/xx.png引用即可。
比如您有一张图片名为xxx.png, 将其移动到/public/images/2024/文件夹下,那您只需要在md文件中,这样引入就可以正常使用了。
使用图床配合PicGo
我是使用的华为免费的对象存储服务,配合picgo的华为云obs插件图片上传。可以参考华为云对象存储-PicGo插件
修改图标
博客中的所有的图标都是使用开源图标库remixicon,可以自行替换自己喜欢的图标。
取消锚点跳转
文章浏览点击锚点跳转之后,使用浏览器自带的返回按钮,会跳转到上一个锚点的位置,而不是上一个页面。
在src/components/Toc.astro中的第48行添加如下代码可以实现,取消锚点显示跳转到上一个页面。
1 tocbot.init({2 tocSelector: ".toc-container",3 contentSelector: ".markdown-body",4 headingSelector: "h1,h2,h3",5 hasInnerContainers: true,6 headingsOffset: 80,7 scrollSmoothOffset: -80,8 scrollSmoothDuration: 200,9 collapseDepth: 3,10 onClick: function (){11 return false12 },13 });